A Colored Pencil Epoxy Floor is one of the most creative and visually captivating flooring techniques to ever enter the world of DIY home design. It blends craftsmanship, resin artistry, and pure imagination into a glossy, glass-like surface that instantly becomes the centerpiece of any room. From porches and bedrooms to creative studios and reading nooks, this style of flooring takes everyday colored pencils and transforms them into an artistic statement that feels both playful and luxurious.
More DIYers are turning to this flooring method because it’s bold, customizable, and surprisingly achievable at home. With the right tools, techniques, and workflow, you can create a floor that looks like it belongs in a high-end art gallery while still being durable enough to withstand daily life. In this detailed guide, you’ll learn everything necessary to plan your project, prepare your materials, work with epoxy safely, and lay out your design with confidence.
Why a Colored Pencil Epoxy Floor Stands Out?
A Colored Pencil Epoxy Floor is more than a decorative element. It’s a conversation starter, a functional artwork, and a unique way to imprint personality into a space. Every installation is different because each arrangement of pencils, color patterns, and resin layers tells its own story.
The appeal lies in three main qualities:
-
Stunning depth and dimension
-
Custom design potential
-
Durability suitable for high-traffic areas
When light hits the glossy epoxy, it reflects off all sides of the colored pencils, enhancing their tones and creating a shimmering, kaleidoscopic effect. If you’re looking for a flooring style that blends creativity and durability, this technique offers one of the most eye-catching results in modern interior design.
Essential Tools Needed for a Flawless Installation
To build a successful Colored Pencil Epoxy Floor, you’ll need a well-rounded set of tools to ensure precision and safety. Below are the essential items every DIYer must gather before starting the project.
1. Measuring & Cutting Tools
You will need tools that help you trim colored pencils effectively and prepare them for even placement across your flooring surface.
-
Pencil cutter or compact miter saw
-
Sharp craft knife
-
Ruler or measuring tape
-
Cutting mat
The pencils must be trimmed to the same length to create an even surface that epoxy can coat uniformly.
2. Epoxy Resin Supplies
Without high-quality epoxy, the floor won’t achieve clarity, strength, or depth. Prepare:
-
Deep-pour epoxy resin
-
Hardener
-
Mixing buckets
-
Stirring sticks
-
Heat gun or butane torch
-
Plastic spreaders or squeegees
Deep-pour resin is crucial because it allows thick layers without excessive heat buildup.
3. Surface Preparation Tools
A durable floor starts with proper adhesion. For that, you’ll need:
-
Floor grinder or orbital sander
-
Shop vacuum
-
Concrete cleaner or degreaser
-
Painter’s tape
-
Plastic sheeting
These tools help ensure a clean, smooth, dust-free base for your epoxy application.
4. Safety Gear
Epoxy requires responsible handling. Always have:
-
Nitrile gloves
-
Respirator mask (rated for fumes)
-
Eye protection
-
Protective clothing
Never skip this step. Even eco-friendly resins give off fumes during curing.
Materials Needed for the Colored Pencil Layer
A Colored Pencil Epoxy Floor wouldn’t exist without the hero of the project — the colored pencils. The more vibrant and diverse the colors, the more dynamic the final result will look.
What You Need:
-
500–2,000 colored pencils (depending on room size)
-
High-quality brand pencils (Prismacolor, Crayola, Faber-Castell, etc.)
-
Clear sealant spray
-
Optional: metallic pencils, neon pencils, dual-tone pencils
Different pencil types produce different tonal effects under epoxy. Mixing multiple brands can create more depth and color variation.
Links to purchase similar products: Click here
Preparing the Surface: The Foundation of Success
Before you begin arranging pencils or mixing epoxy, your floor must be fully prepped. Proper preparation ensures that your Colored Pencil Epoxy Floor bonds to the substrate and remains flawless for years.
1. Clean & Degrease
Start by removing dirt, oils, adhesives, and debris. Concrete especially needs degreasing to ensure resin adhesion.
2. Grind or Sand the Surface
Sanding increases the “tooth” of the surface, giving epoxy something to grip. A light grind is typically enough for concrete. For wood subfloors, hand-sanding or machine-sanding should work.
3. Vacuum Thoroughly
Dust is the mortal enemy of epoxy. Clean multiple times if needed until no particles remain.
4. Apply a Primer Layer
A thin coat of epoxy primer helps seal porous surfaces and prevents bubbles from rising into the resin layers.
Once the surface is fully prepped, you’re ready to begin the artistic phase.
Designing Your Colored Pencil Layout
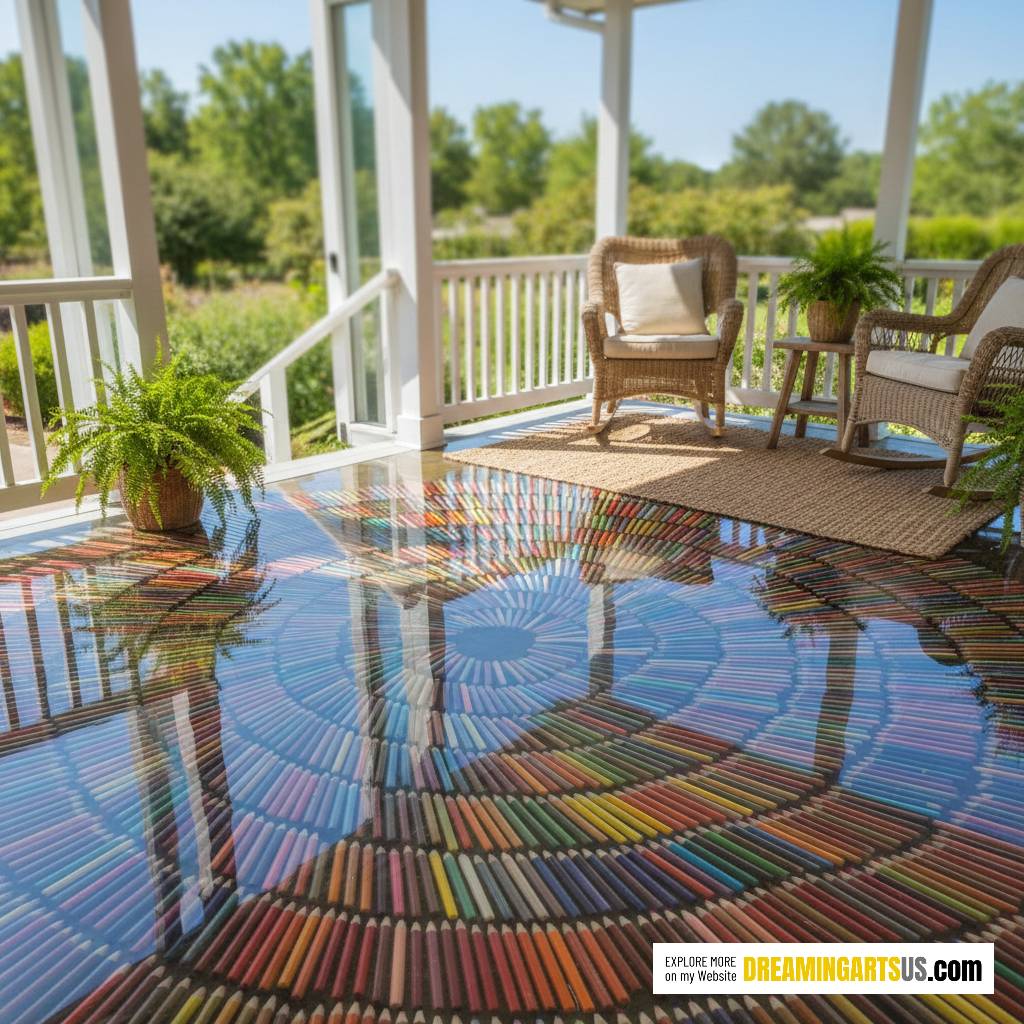
The design stage is where your creativity becomes reality. A Colored Pencil Epoxy Floor can be arranged in endless ways: spirals, radiating sunbursts, geometric paths, or free-flow patterns.
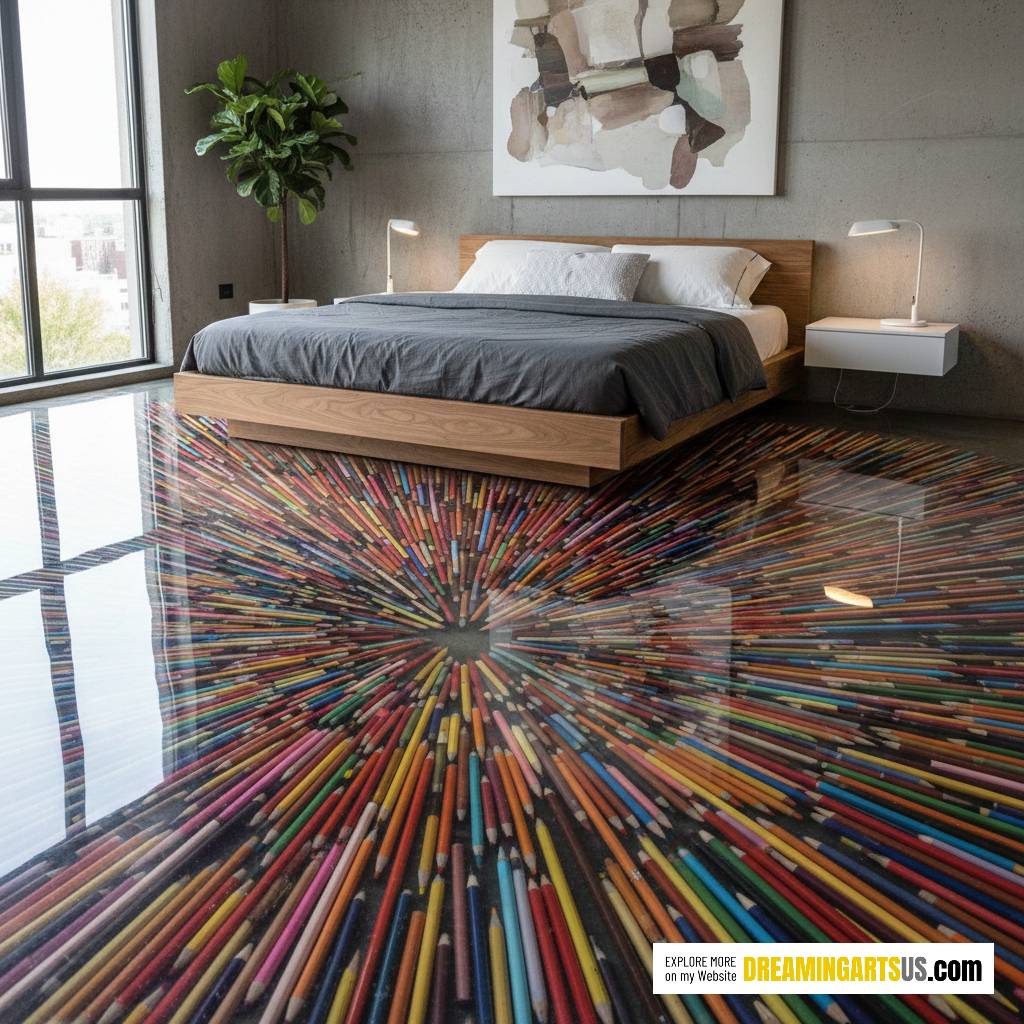
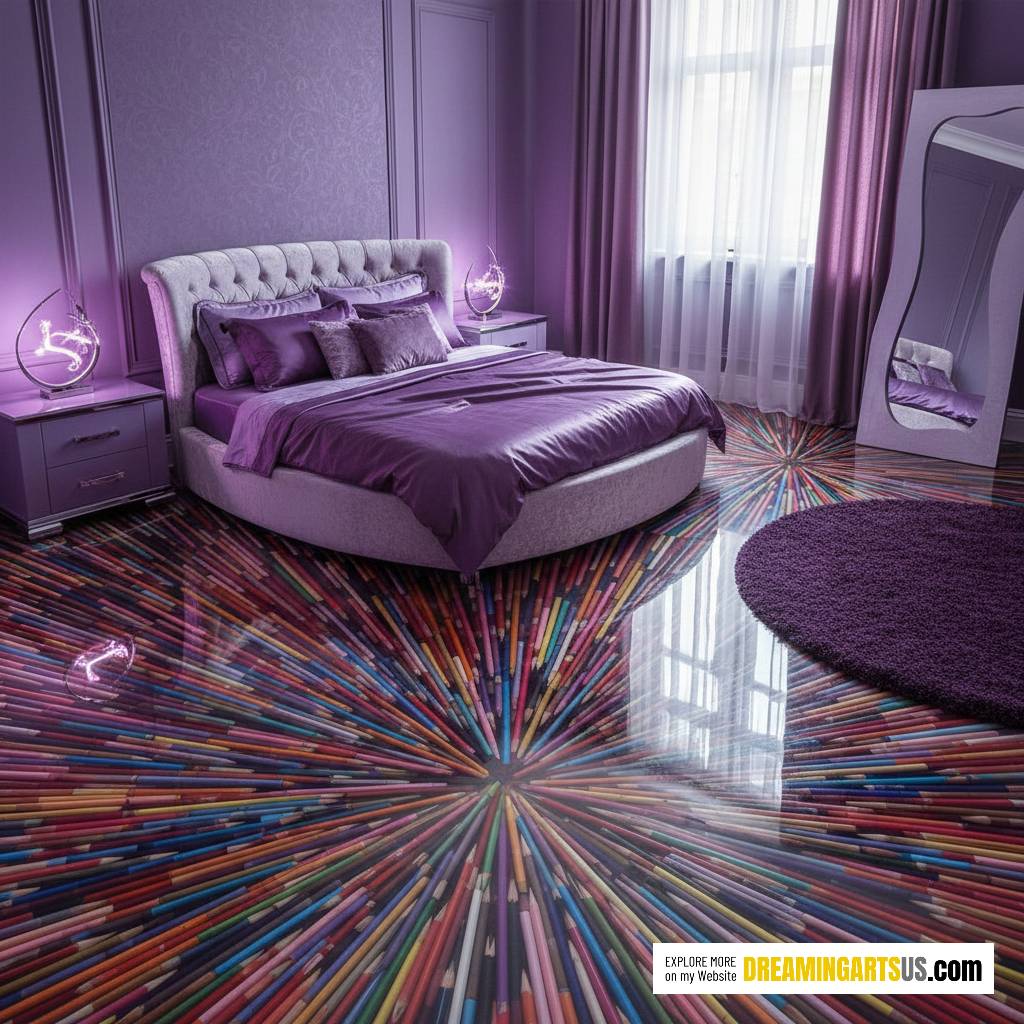
1. Radial Burst Design
One of the most stunning visual styles, this layout places pencils radiating outward from a central point. It’s ideal for living rooms, bedrooms, and studios.
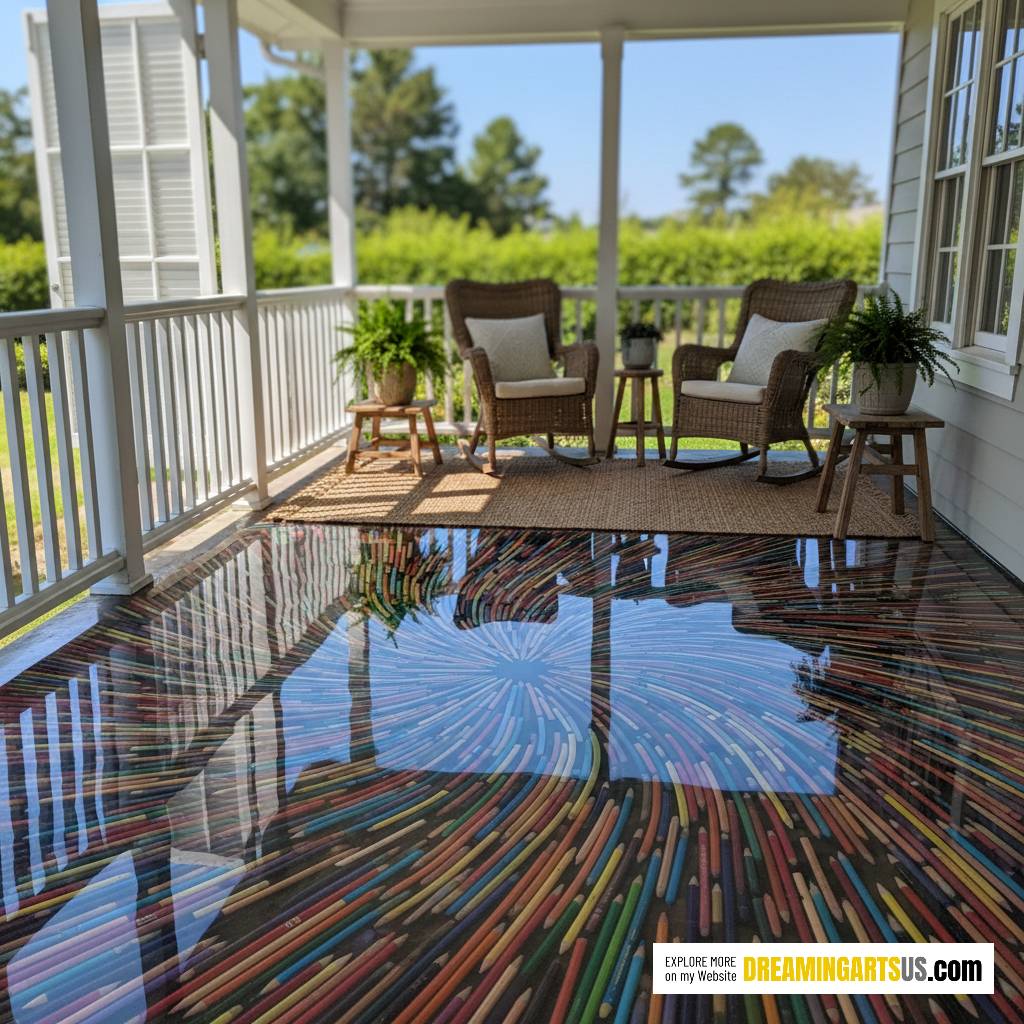
2. Waves & Ripples
Arranging pencils in flowing patterns gives a sense of movement and can mimic natural epoxy river effects.
3. Geometric Blocks
Perfect for modern homes, you can create squares, grids, or angled symmetry.
4. Rainbow Gradient
Organize pencils by hue, moving gradually from warm to cool tones.
5. Random Artistic Chaos
An intentionally unstructured layout creates a dynamic, abstract effect that always becomes a conversation piece.
Cutting and Preparing the Colored Pencils
Before you begin laying out the pencils, they must be trimmed to uniform length. This ensures consistent epoxy depth and reduces air pockets.
Steps for Pencil Preparation:
-
Cut each pencil to the same length.
Use a miter saw for quick accuracy or a craft knife for smaller quantities. -
Seal the exposed wood ends.
Spray sealant prevents bubbles from forming during epoxy pouring. -
Organize pencils by color.
This makes layout faster and more cohesive. -
Test the arrangement before gluing down.
A dry layout gives you a preview and allows adjustments before committing.
Installing the Colored Pencil Layer
Once you have your design ready, it’s time to secure the pencils to the floor.
1. Use Clear Adhesive
A strong clear adhesive keeps pencils from floating during the epoxy pour. Apply a small dot and press each pencil firmly.
2. Work in Sections
Large rooms can feel overwhelming. Breaking the floor into quadrants helps maintain precision and pattern consistency.
3. Double-Check Pencil Spacing
Consistent gaps ensure epoxy flows evenly around the pencils.
4. Protect Surrounding Areas
Use plastic sheeting, especially if your layout extends near walls or built-in furniture.
Mixing & Pouring the Epoxy Resin
Now comes the exciting part — creating the glossy, glass-like surface that defines a Colored Pencil Epoxy Floor. Epoxy pouring requires focus, timing, and accuracy.
1. Mix Small Batches
Deep-pour epoxy often generates heat. Mixing smaller amounts minimizes the risk of overheating or premature curing.
2. Stir Slowly
Fast stirring introduces bubbles. Slow, steady mixing creates a clearer finish.
3. Pour in Layers
For deep installations, two or three pours are ideal. Each layer should cure before adding the next.
4. Remove Bubbles Immediately
Use a heat gun or torch to gently wave over the epoxy surface, clearing micro-bubbles.
5. Maintain Room Temperature
Epoxy cures best at 70–75°F (21–24°C). Avoid drafts, humidity spikes, or direct sunlight.
Once cured, the resin forms a durable, high-gloss shell that protects the pencils and gives the floor its iconic depth.
Tips & Techniques for the Best Results
Creating a Colored Pencil Epoxy Floor isn’t difficult, but a few expert techniques make a dramatic difference in the final outcome.
1. Use a Base Color Coat
A white or black base underneath pencils helps them pop visually.
2. Seal Pencils Twice
A second spray seal prevents wood fibers from absorbing epoxy and causing cloudy spots.
3. Elevate Furniture During Curing
If the room has heavy furniture, plan to elevate or temporarily remove everything until epoxy fully hardens.
4. Work with Natural Light
Proper lighting helps you detect bubbles, uneven areas, or resin pooling.
5. Be Patient During Curing
Deep-pour epoxy cures slowly for maximum clarity. Rushing can compromise the final finish.
Common Mistakes and How to Avoid Them
Even skilled DIYers can make errors the first time they attempt an epoxy floor. Knowing the pitfalls helps you avoid costly mistakes.
Using low-quality colored pencils
Cheap pencils can crack, bleed pigment, or warp under resin. Choose durable, professional-grade brands.
Pouring epoxy too thick at once
This can cause overheating, yellowing, or premature cracking.
Skipping primer
Unprimed surfaces allow air bubbles to escape into the resin, creating cloudiness.
Not sealing pencil ends
Wood absorbs moisture, which can lead to trapped air inside the resin.
Poor temperature control
Too cold or warm conditions affect curing integrity.
Learning from these mistakes ensures your Colored Pencil Epoxy Floor looks as perfect as professional installations.
Maintenance Guide: Keeping Your Floor Looking Flawless
The beauty of a Colored Pencil Epoxy Floor is that it’s low-maintenance. With proper care, the shine can last for decades.
Daily or Weekly Care:
-
Sweep regularly to avoid scratches.
-
Use a microfiber mop with warm water.
-
Avoid abrasive cleaners.
Long-Term Care:
-
Reapply a polyurethane topcoat every few years for extra protection.
-
Place pads under furniture legs.
-
Clean spills quickly to preserve the glossy finish.
Where to Use a Colored Pencil Epoxy Floor
This flooring technique works across many spaces, each offering a different mood and visual impact.
1. Porches & Sunrooms
Sunlight intensifies the color reflections, creating a warm and artistic environment.
2. Bedrooms
The glossy, artistic effect adds personality and uniqueness that elevates the entire room.
3. Art Studios
Perfect for creative spaces, inspiring imagination and matching an artistic lifestyle.
4. Kids’ Rooms
Bright colors and durable resin make it fun, safe, and visually dynamic.
5. Home Offices
It transforms a simple workspace into a motivating, energetic setting.
Cost Breakdown for DIYers
Creating a Colored Pencil Epoxy Floor varies in cost depending on room size and material quality.
Estimated Costs:
-
Colored pencils: $150–$600
-
Epoxy resin (deep pour): $200–$700
-
Tools & safety gear: $100–$400
-
Sanding & prep materials: $50–$150
-
Optional primer & topcoat: $60–$120
Total DIY Range: $560–$1,970
Still far more affordable than hiring an epoxy flooring professional.
Link to buy similar products: Click here
Is This Project Right for You?
A Colored Pencil Epoxy Floor fits anyone with a creative spirit, a bit of patience, and a desire to build custom home decor. If you enjoy DIY projects that blend art and craftsmanship, this flooring method will be a rewarding experience.
It’s ideal for:
-
DIY beginners willing to follow step-by-step processes
-
Artists and creative homeowners
-
People who want something one-of-a-kind
-
Anyone renovating on a budget but wanting high-end aesthetics
A Colored Pencil Epoxy Floor is one of the most imaginative flooring options a DIYer can tackle. It blends color, texture, craftsmanship, and resin artistry into a stunning surface that elevates any interior space. Whether you choose a radial burst, a flowing gradient, or a random mosaic, your floor will become a vibrant piece of functional art that reflects personality and passion.
With the right tools, proper preparation, and attention to detail, you can create a floor that captures light, transforms a room, and lasts for years. This style represents the perfect fusion of DIY creativity and interior design innovation — a true masterpiece that you get to walk on every day.
If you’re ready to explore more inspiring epoxy ideas, creative home innovations, or DIY flooring concepts, your next design breakthrough is only one project away.


